For Application Developers
Visualization
|
|
Geant4 User's Guide For Application Developers Visualization |
Details are given below for:
Table 8.3.1 lists required graphics systems and supported platforms for the various visualization drivers
| Driver | Required Graphics System | Platform |
| OpenGL-Xlib | OpenGL | Linux, Unix, Mac with Xlib |
| OpenGL-Motif | OpenGL | Linux, UNIX, Mac with Motif |
| OpenGL-Win32 | OpenGL | Windows |
| OpenInventor-X | OpenInventor, OpenGL | Linux, UNIX, Mac with Xlib or Motif |
| OpenInventor-Win32 | OpenInventor, OpenGL | Windows |
| HepRep | WIRED or FRED HepRep Browser | Linux, UNIX, Mac, Windows |
| DAWNFILE | Fukui Renderer DAWN | Linux, Unix, Mac, Windows |
| DAWN-Network | Fukui Renderer DAWN | Linux, UNIX |
| VRMLFILE | any VRML viewer | Linux, UNIX, Mac, Windows |
| VRML-Network | any network-enabled VRML viewer | Linux, UNIX |
| RayTracer | any JPEG viewer | Linux, UNIX, Mac, Windows |
| ASCIITree | none | Linux, UNIX, Mac, Windows |
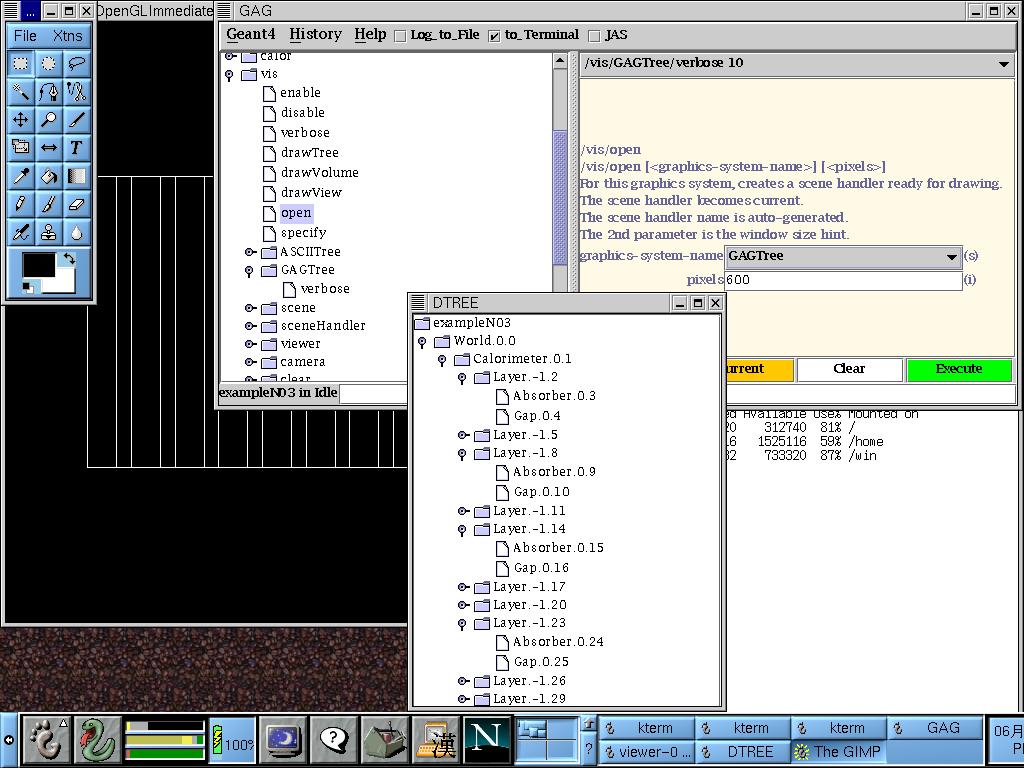
| GAGTree | GAG | Linux, UNIX, Mac, Windows |
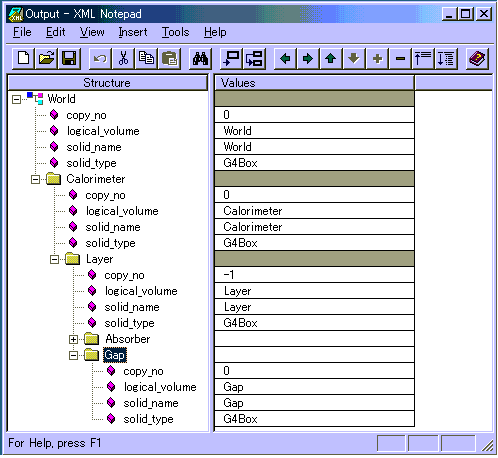
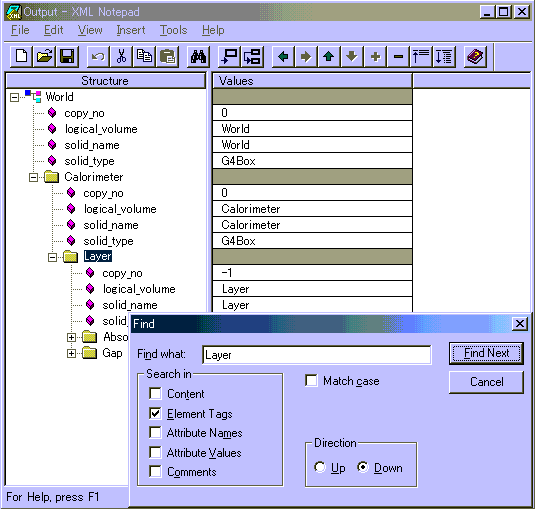
| XMLTree | any XML viewer | Linux, UNIX, Mac, Windows |
Several versions of the OpenGL drivers are prepared. Versions for Xlib, Motif and Win32 platforms are available by default. For each version, there are two modes: immediate mode and stored mode. The former has no limitation on data size, and the latter is fast for visualizing large data repetitively, and so is suitable for animation.
If you don't have Motif, all control is done from Geant4 commands:
     /vis/open OGLIX
     /vis/viewer/set/viewpointThetaPhi 70 20
     /vis/viewer/zoom 2
     etc.
But if you have Motif libraries, you can control Geant4 from Motif widgets:
/vis/open OGLIXm
The OpenGL driver added Smooth shading and Transparency since Geant4 release 8.0.
Further information (OpenGL and Mesa):
It is also possible to save a visualized 3D scene as an OpenInventor-formatted file, and re-visualize the scene afterwards.
Because it is connected directly to the Geant4 kernel, using same language as that kernel (C++), OpenInventor systems can have direct access to Geant4 data (geometry, trajectories, etc.).
Because OpenInventor uses OpenGL for rendering, it supports lighting and transparency.
OpenInventor provides thumbwheel control to rotate and zoom.
OpenInventor supports picking to ask about data. [Control Clicking] on a volume turns on rendering of that volume's daughters. [Shift Clicking] a daughter turns that rendering off: If modeling opaque solid, effect is like opening a box to look inside.
Further information (HEPVis and OpenScientist):
Further information (OpenInventor):
The HepRep graphics format is further described at http://www.slac.stanford.edu/~perl/heprep.
To write just the detector geometry to this file, use the command:
/vis/viewer/flush
Or, to also include trajectories and hits (after the appropriate /vis/viewer/add/trajectories or /vis/viewer/add/hits commands), just issue:
/run/beamOn 1
HepRepFile will write a file called G4Data0.heprep to the current directory. Each subsequent file will have a file name like G4Data1.heprep, G4Data2.heprep, etc.
View the file using the WIRED3 HepRep Browser, available from: http://www.slac.stanford.edu/BFROOT/www/Computing/Graphics/Wired/.
WIRED3 allows you to pick on volumes, trajectories and hits to find out their associated HepRep Attributes, such as volume name, particle ID, momentum, etc. These same attributes can be displayed as labels on the relevant objects, and you can make visibility cuts based on these attributes ("show me only the photons", or "omit any volumes made of iron").
WIRED3 can read heprep files in zipped format as well as unzipped, so you can save space by applying gzip to the heprep file. This will reduce the file to about five percent of its original size.
Several environment variables are available to override some of HepRepFile's defaults
export G4HEPREPFILE_DIR=someOtherDir/someOtherSubDir
export G4HEPREPFILE_NAME=myFileNamewhich will produce files named myFileName0.heprep, myFileName1.heprep, etc.
export G4HEPREPFILE_OVERWRITE=1This may be useful in some automated applications where you always want to see the latest output file in the same location.
export G4HEPREPFILE_CULL=1
Further information:
This driver can write both Binary HepRep (.bheprep) and XML HepRep (.heprep) files. Binary HepRep files are a one-to-one translation of XML HepRep files, but they are considerably shorter and faster to parse by a HepRepViewer such as WIRED 4.
Both Binary HepRep and XML HepRep can be compressed using the standard zlib library if linked into Geant4 using G4LIB_USE_ZLIB. If a standard zlib is not available (WIN32-VC for instance) you should also set G4LIB_BUILD_ZLIB to build G4zlib included with Geant4.
HepRep files (Binary and XML) can contain multiple HepRep events/geometries. If the file contains more than one HepRep it is not strictly XML anymore. Files can be written in .heprep.zip, .heprep.gz or .heprep format and their binary versions .bheprep.zip, .bheprep.gz or .bheprep.
The .heprep.zip is the default for file output, the .heprep is the default for stdout and stderr.
(Optional) To set the filename with a particular extension such as: .heprep.zip, .heprep.gz, .heprep, .bheprep.zip, .bheprep.gz or .bheprep use for instance:
/vis/scene/create filename.bheprep.zip
(Optional) To create separate files for each event, you can set a suffix such as "-0001" to start writing files from filename-0001.bheprep.zip to filename-9999.bheprep.zip (or up), while "-55-sub" will start write files filename-55-sub.bheprep.zip to filename-99-sub.bheprep.zip (or up).
/vis/heprep/setEventNumberSuffix -0001(Note: suffix has to contain at least one digit)
(Optional) To route the HepRep XML output to stdout (or stderr), by default uncompressed, use:
/vis/scene/create stdout
(Optional) To add attributes to each point on a trajectory, use:
/vis/heprep/addPointAttributes 1
Be aware that this may increase the size of the output dramatically.
(Optional) You may use the commands:
/vis/viewer/zoom to set an initial zoom factor
/vis/viewer/set/viewpointThetaPhi to set an initial view point
/vis/heprep/setCoordinateSystem uvw to change the coordinate system, where uvw can be "xyz", "zxy", ...
(Optional) You may decide to write .zip files with events and geometry separated (but linked). This results in a smaller zip file, as the geometry is only written once. Use the command:
/vis/heprep/appendGeometry false
(Optional) To close the file, remove the SceneHandler, use:
/vis/sceneHandler/remove scene-handler-0
Limitations: Only one SceneHandler can exist at any time, connected to a single Viewer. Since the HepRep format is a model rather than a view this is not a real limitation. In WIRED 4 you can create as many views (SceneHandlers) as you like.
Further information:
When Geant4 Visualization is performed with the DAWN driver, the visualized view is automatically saved to a file named g4.eps in the current directory, which describes a vectorized (Encapsulated) PostScript data of the view.
There are two kinds of DAWN drivers, the DAWNFILE driver and the DAWN-Network driver. The DAWNFILE driver is usually recommended, since it is faster and safer in the sense that it is not affected by network conditions.
The DAWNFILE driver sends 3D data to DAWN via an intermediate file, named g4.prim in the current directory. The file g4.prim can be re-visualized later without the help of Geant4. This is done by invoking DAWN by hand:
% dawn g4.prim
DAWN files can also serve as input to two additional programs:
The DAWN-Network driver is almost the same as the DAWNFILE driver except that
Usually, the visualization host is your local host, while the Geant4 host is a remote host where you log in, for example, with the telnet command. This enables distributed processing of Geant4 visualization, avoiding the transfer of large amounts of visualization data to your terminal display via the network. This section describes how to perform remote Geant4 visualization with the DAWN-Network driver. In order to do it, you must install the Fukui Renderer DAWN on your local host beforehand.
The following steps realize remote Geant4 visualization viewed by DAWN.
Local_Host> dawn -GThis invokes DAWN with the network connection mode.
Remote_Host> setenv G4DAWN_HOST_NAME local_host_nameFor example, if you are working in the local host named "arkoop.kek.jp", set this environment variable as follows:
Remote_Host> setenv G4DAWN_HOST_NAME arkoop.kek.jpThis tells a Geant4 process running on the remote host where Geant4 Visualization should be performed, i.e., where the visualized views should be displayed.
       Idle> /vis/open DAWN
       Idle> /vis/drawVolume
       Idle> /vis/viewer/flush
In step 4, 3D scene data are sent from the remote host to the local host as DAWN-formatted data, and the local DAWN will visualize the data. The transferred data are saved as a file named g4.prim in the current directory of the local host.
Further information:
Further information:
There are two kinds of VRML drivers: the VRMLFILE driver, and the VRML-Network driver. The VRMLFILE driver is usually recommended, since it is faster and safer in the sense that it is not affected by network conditions.
The VRMLFILE driver sends 3D data to your VRML viewer, which is running on the same host machine as Geant4, via an intermediate file named g4.wrl created in the current directory. This file can be re-visualization afterwards. In visualization, the name of the VRML viewer should be specified by setting the environment variable G4VRML_VIEWER beforehand. For example,
% setenv G4VRML_VIEWER "netscape"
Its default value is NONE, which means that no viewer is invoked and only the file g4.wrl is generated.
Usually, the visualization host is your local host, while the Geant4 host is a remote host where you log in, for example, with the telnet command. This enables distributed processing of Geant4 visualization, avoiding the transfer of large amounts of visualization data to your terminal display via the network.
In order to perform remote visualization with the VRML-Network driver, the following must be installed on your local host beforehand:
source/visualization/VRML/g4vrmlview/. Installation instructions for g4vrmlview can be found in the README file there, or on the WWW page below.
The following steps realize remote Geant4 visualization displayed with your local VRML browser:
Local_Host> java g4vrmlview VRML_viewer_nameFor example, if you want to use the Netscape browser as your VRML viewer, execute g4vrmlview as follows:
Local_Host> java g4vrmlview netscapeOf course, the command path to the VRML viewer should be properly set.
Remote_Host> setenv G4VRML_HOST_NAME local_host_nameFor example, if you are working on the local host named "arkoop.kek.jp", set this environment variable as follows:
Remote_Host> setenv G4VRML_HOST_NAME arkoop.kek.jpThis tells a Geant4 process running on the remote host where Geant4 Visualization should be performed, i.e., where the visualized views should be displayed.
       Idle> /vis/open VRML2
       Idle> /vis/drawVolume
       Idle> /vis/viewer/update
In step 4, 3D scene data are sent from the remote host to the local host as VRML-formatted data, and the VRML viewer specified in step 3 is invoked by the g4vrmlview process to visualize the VRML data. The transferred VRML data are saved as a file named g4.wrl in the current directory of the local host.
Further information:
Further information (VRML drivers):
Sample VRML files:
Further information (VRML language and browsers):
Some pieces of geometries may fail to show up in other visualization drivers (due to algorithms those drivers use to compute visualizable shapes and polygons), but RayTracer can handle any geometry that the Geant4 navigator can handle.
Because RayTracer in essence takes over Geant4's tracking routines for its own use, RayTracer cannot be used to visualize Trajectories or hits.
An X-Window version, called RayTracerX, can be selected by setting G4VIS_BUILD_RATRACERX_DRIVER at Geant4 library build time and G4VIS_USE_RAYTRACERX at application (user code) build time (assuming you use the standard visualization manager, G4VisExecutive, or an equally smart vis manager). RayTracerX builds the same jpeg file as RayTracer, but simultaneously renders to screen so you can watch as rendering grows progressively smoother.
RayTracer has its own built-in commands - /vis/rayTracer/.... Alternatively, you can treat it as a normal vis system and use /vis/viewer/... commands, e.g:
  /vis/open RayTracerX
  /vis/drawVolume
  /vis/viewer/set/viewpointThetaPhi 30 30
  /vis/viewer/refresh
The view parameters are translated into the necessary RayTracer parameters.
RayTracer is compute intensive. If you are unsure of a good viewing angle or zoom factor, you might be advised to choose them with a faster renderer, such as OpenGL, and transfer the view parameters with /vis/viewer/set/all:
  /vis/open OGLSXm  # or any of the OGL options.  Opens, say, viewer-0.
  /vis/drawVolume
  /vis/viewer/zoom  # plus any /vis/viewer/commands that get you the view you want.
  /vis/open RayTracerX
  /vis/viewer/set/all viewer-0
  /vis/viewer/refresh
Each call to /vis/viewer/flush or /vis/drawTree will dump the tree.
ASCIITree has command to control its verbosity, /vis/ASCIITree/verbose. The verbosity value controls the amount of information available, e.g., physical volume name alone, or also logical volume and solid names. If the volume is "sensitive" and/or has a "readout geometry", this may also be indicated. Also, the mass of the physical volume tree(s) can be printed (but beware - higher verbosity levels can be computationally intensive).
At verbosity level 4, ASCIITree calculates the mass of the complete geometry tree taking into account daughters up to the depth specified for each physical volume. The calculation involves subtracting the mass of that part of the mother that is occupied by each daughter and then adding the mass of the daughter, and so on down the hierarchy.
     /vis/ASCIITree/Verbose 4
     /vis/viewer/flush
     "HadCalorimeterPhysical":0 / "HadCalorimeterLogical" / "HadCalorimeterBox"(G4Box), 1.8 m3 , 11.35 g/cm3
     "HadCalColumnPhysical":-1 (10 replicas) / "HadCalColumnLogical" / "HadCalColumnBox"(G4Box), 180000 cm3, 11.35 g/cm3
     "HadCalCellPhysical":-1 (2 replicas) / "HadCalCellLogical" / "HadCalCellBox"(G4Box), 90000 cm3, 11.35 g/cm3
     "HadCalLayerPhysical":-1 (20 replicas) / "HadCalLayerLogical" / "HadCalLayerBox"(G4Box), 4500 cm3, 11.35 g/cm3
     "HadCalScintiPhysical":0 / "HadCalScintiLogical" / "HadCalScintiBox"(G4Box), 900 cm3, 1.032 g/cm3

     Calculating mass(es)...
     Overall volume of "worldPhysical":0, is 2400 m3
     Mass of tree to unlimited depth is 22260.5 kg
Some more examples of ASCIITree in action:
     Idle> /vis/ASCIITree/verbose 1
     Idle> /vis/drawTree
     #  Set verbosity with "/vis/ASCIITree/verbose ":
     #    <  10: - does not print daughters of repeated placements, does not repeat replicas.
     #    >= 10: prints all physical volumes.
     #  The level of detail is given by verbosity%10:
     #  for each volume:
     #    >=  0: physical volume name.
     #    >=  1: logical volume name (and names of sensitive detector and readout geometry, if any).
     #    >=  2: solid name and type.
     #    >=  3: volume and density.
     #    >=  5: daughter-subtracted volume and mass.
     #  and in the summary at the end of printing:
     #    >=  4: daughter-included mass of top physical volume(s) in scene to depth specified.
     .....
     "Calorimeter", copy no. 0, belongs to logical volume "Calorimeter"
       "Layer", copy no. -1, belongs to logical volume "Layer" (10 replicas)
         "Absorber", copy no. 0, belongs to logical volume "Absorber"
           "Gap", copy no. 0, belongs to logical volume "Gap"
     .....
     Idle> /vis/ASCIITree/verbose 15
     Idle> /vis/drawTree
     ....
      "tube_phys":0 / "tube_L" / "tube"(G4Tubs), 395841 cm3, 1.782 mg/cm3, 9.6539e-08 mm3, 1.72032e-10 mg
        "divided_tube_phys":0 / "divided_tube_L" / "divided_tube"(G4Tubs), 65973.4 cm3, 1.782 mg/cm3, 7587.54 cm3, 13.521 g
          "divided_tube_inset_phys":0 / "divided_tube_inset_L" / "divided_tube_inset"(G4Tubs), 58385.9 cm3, 1.782 mg/cm3, 6.03369e-09 mm3, 1.0752e-11 mg
            "sub_divided_tube_phys":0 / "sub_divided_tube_L" / "sub_divided_tube"(G4Tubs), 14596.5 cm3, 1.782 mg/cm3, 12196.5 cm3, 21.7341 g
     .....
     Calculating mass(es)...
     Overall volume of "expHall_P":0, is 8000 m3  and the daughter-included mass to unlimited depth is 78414 kg
     .....
For the complete list of commands and options, see the Control...UICommands section of this user guide.


